Whitelisting a Domain
Domain Whitelisting auto-grants workspace access to everyone on your email domain.
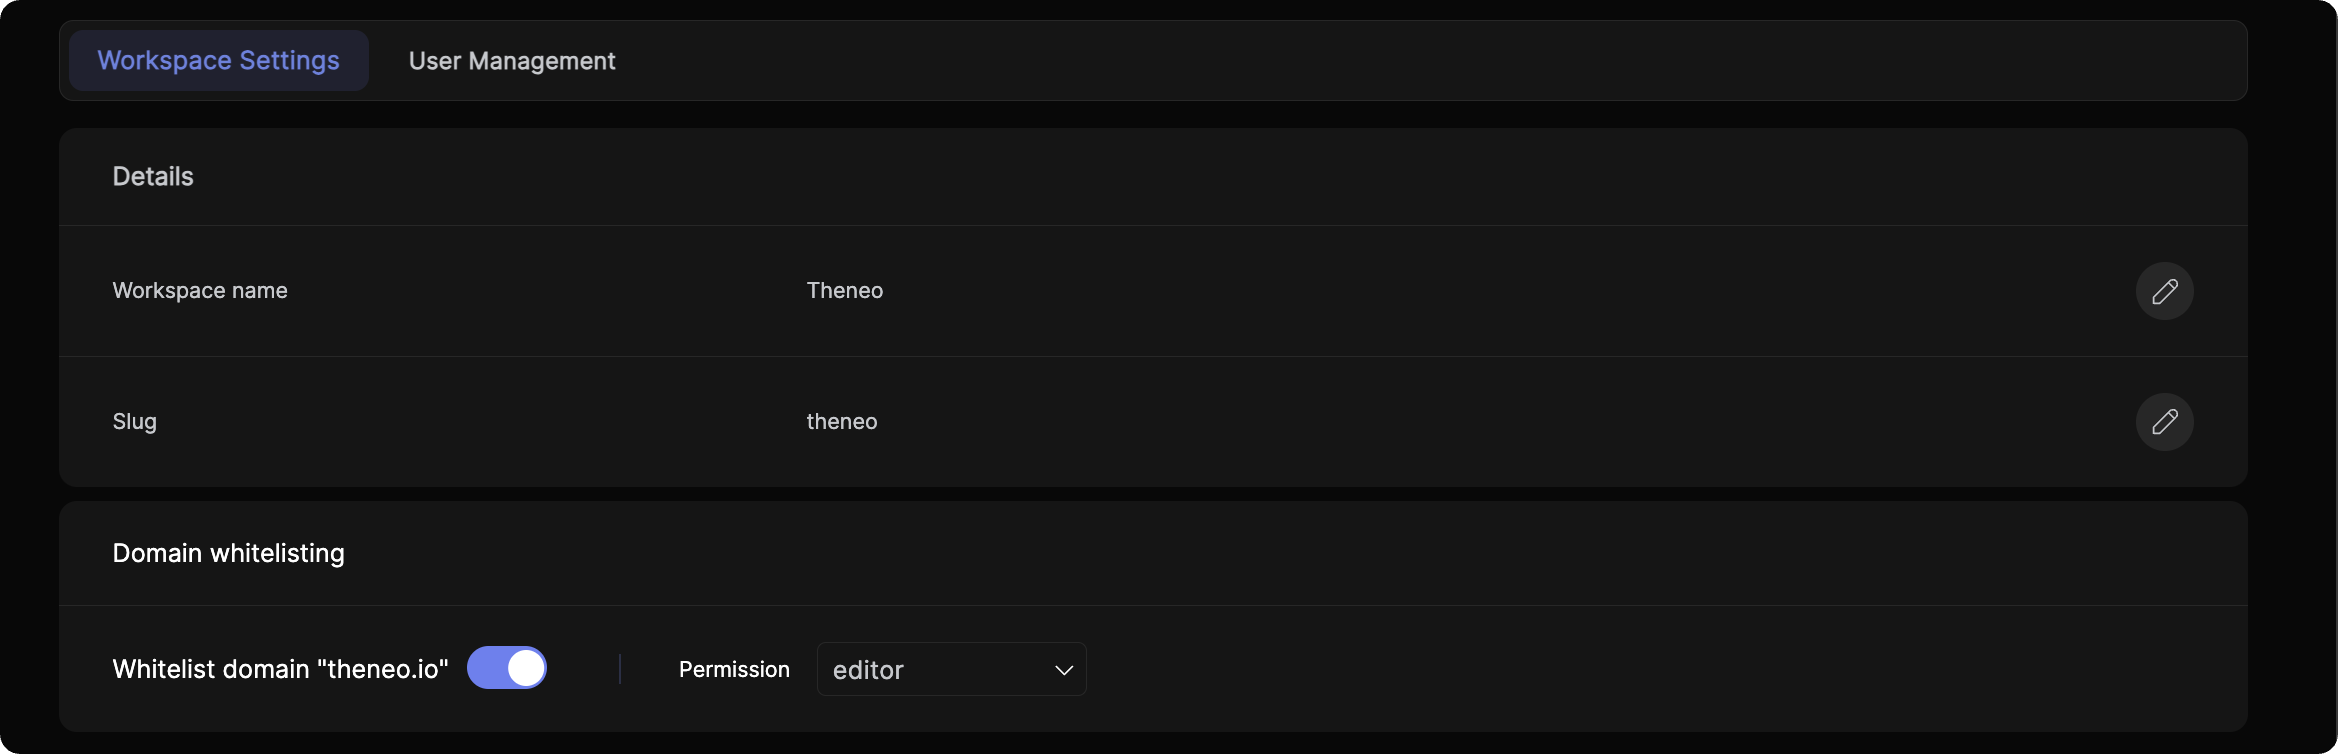
Set up domain whitelisting
- Open Workspace Settings — go to Settings in the Theneo sidebar, then Workspace Settings under the Admin section.
- Enable whitelisting — find the Domain whitelisting section, enter your domain (e.g.
yourcompany.io), and toggle it On. - Assign permissions — choose the default permission level for new users from the dropdown: Viewer, Editor, or Admin.
Manage project access
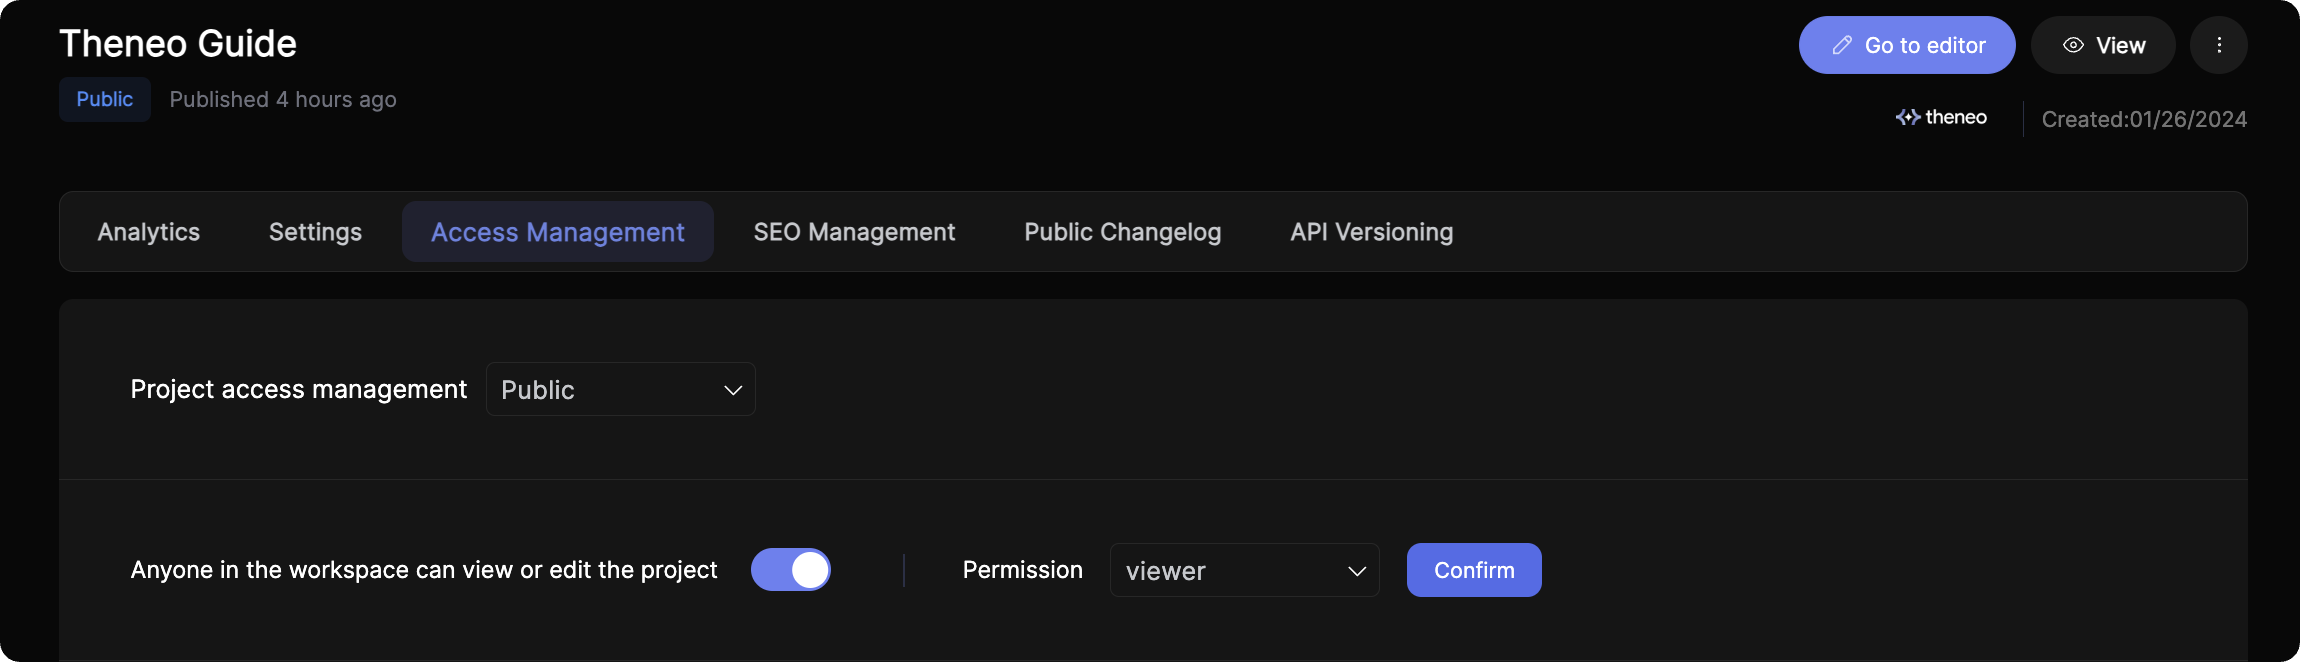
- Open Project Settings — select the project from your dashboard and click its Settings tab.
- Configure access — in Access Management, use the Project access management dropdown to set visibility: Private, Public, or Domain (accessible only to users on the whitelisted domain).
- Set workspace permissions — toggle Anyone in the workspace can view or edit the project and choose the permission level, setting the default access for all whitelisted-domain users.
Automatic user addition
Once enabled and configured, users whose email matches the whitelisted domain are automatically added to the workspace with the default permissions you set.
Tips & best practices
- Review permissions regularly to keep them aligned with your access policies.
- Communicate changes to your team to avoid confusion.
- Use domain-specific emails so team members fully benefit from the feature.
Requirements & limitations
- Email domain verification — your domain must be verified with Theneo; only matching addresses are auto-added.
- Permission levels — understand the implications of Viewer, Editor, and Admin to avoid unintended access.
- Project visibility — setting a project to Domain restricts access to whitelisted-domain users, even if it's otherwise public.
Was this section helpful?


On this page
- Whitelisting a Domain