Microsoft Entra SSO
Microsoft Entra SSO lets your team sign in to Theneo with existing Azure AD credentials.
Step 1: Initiate sign-in
- Go to the Theneo login page.
- Select Sign in with Microsoft Azure AD to begin authentication and get redirected to Microsoft.
Step 2: Consent on behalf of your organization
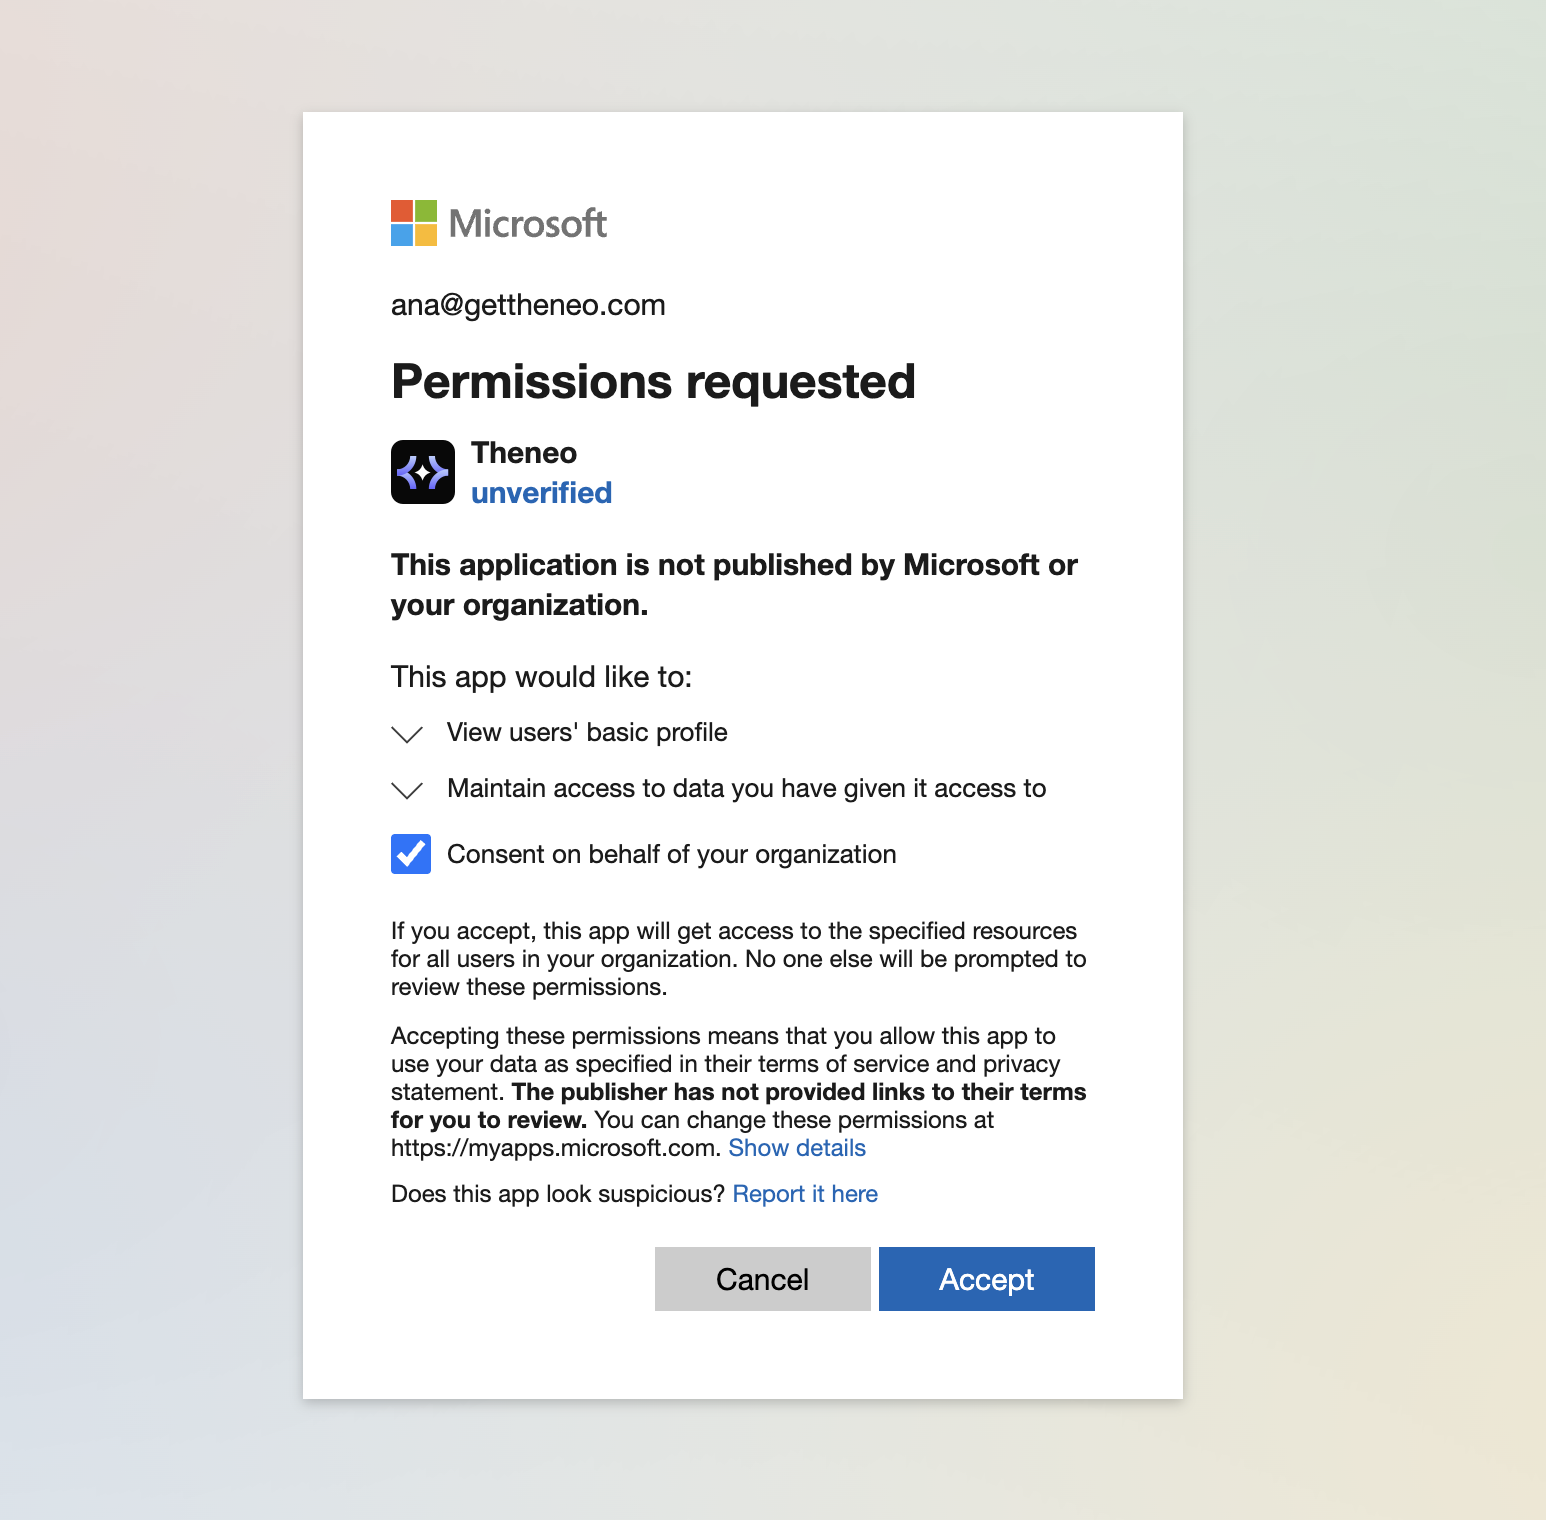
- Enter your administrator credentials if prompted.
- Review the permissions Theneo requests (e.g. viewing your basic profile and maintaining access to data).
- Select Consent on behalf of your organization so individual users don’t have to consent separately.
- Click Accept to authorize the integration; Microsoft confirms and redirects you back to Theneo.
Step 3: Configure access in Microsoft Entra
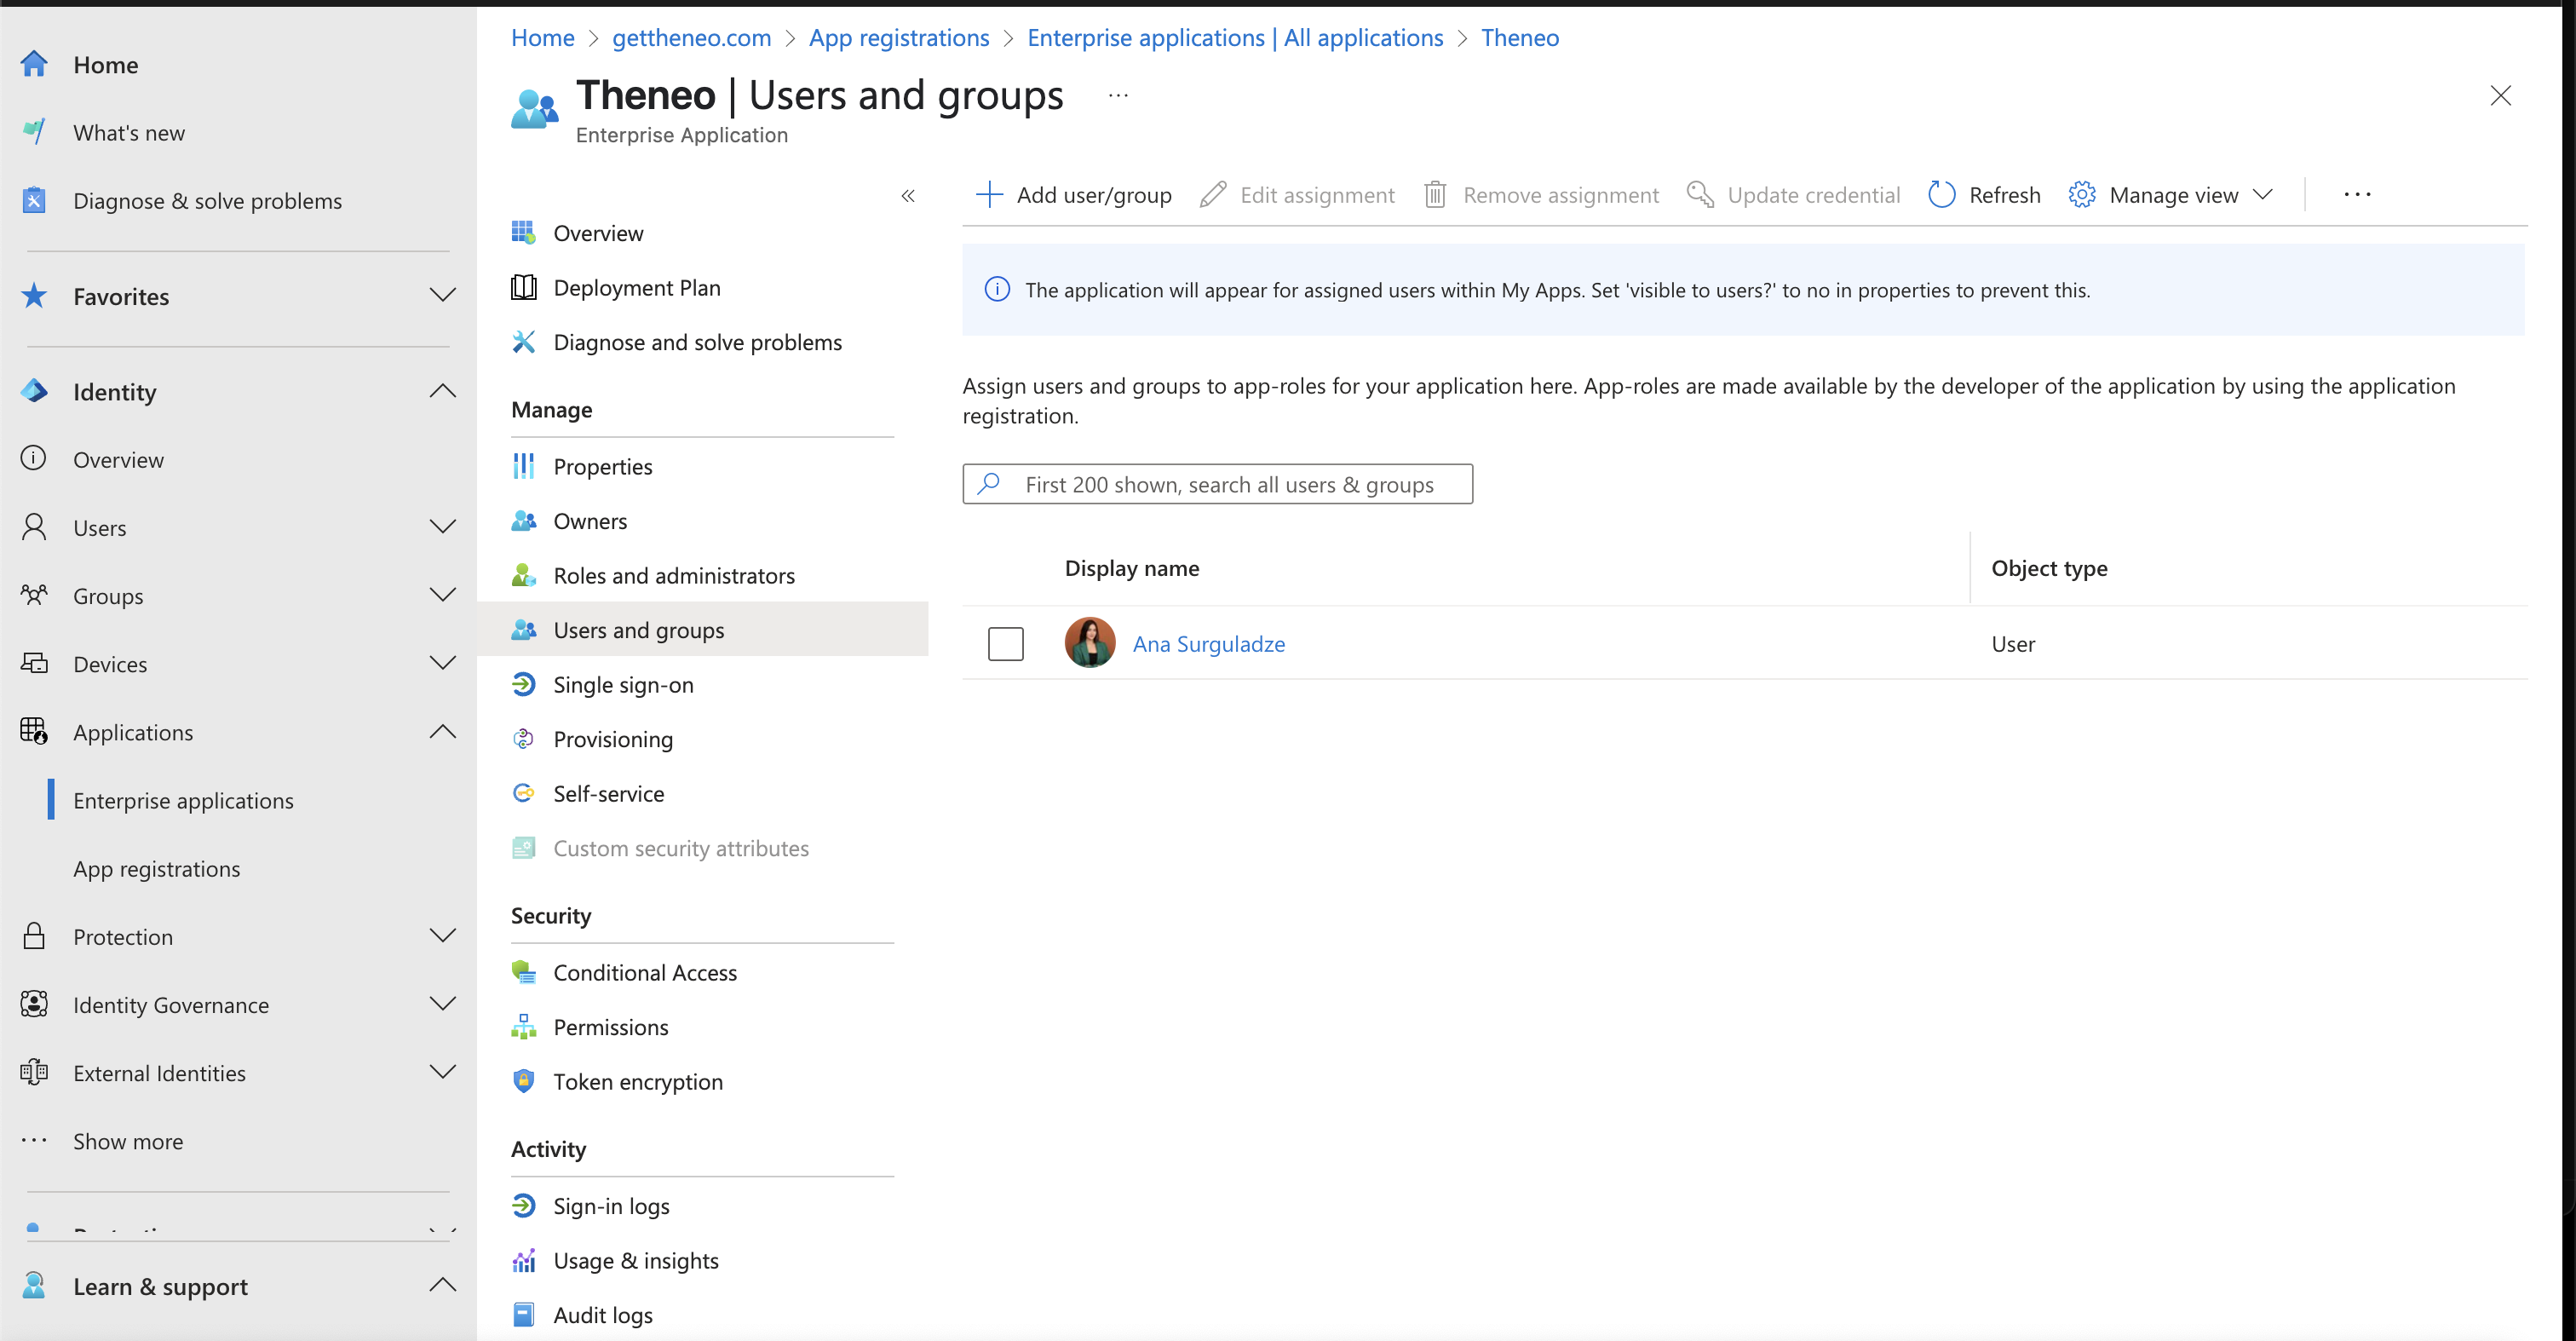
- Sign in to the Microsoft Entra admin center.
- Navigate to Enterprise Applications.
- Search for Theneo and open the application.
- Go to Users and groups in the sidebar.
- Click Add user/group, then select the specific users or groups who need access.
- Click Assign to confirm their permissions.
Step 4: Verify access
- Ask assigned users to go to Theneo’s login page.
- Have them select Sign in with Microsoft Azure AD.
- Confirm they can log in and access their accounts without issues.
Recommended best practices
- Conditional Access policies — enforce additional security in Entra, such as restrictions based on location, device compliance, or user risk.
- Audit & sign-in logs — regularly review Entra’s sign-in and audit logs to monitor for unusual activity.
- Self-service access — enable self-service options so users can request access directly, reducing admin overhead.
By following this guide, admins can set up and manage secure SSO access to Theneo through Microsoft Entra — greatly simplifying access management and improving security.
Was this section helpful?


On this page
- Microsoft Entra SSO